[JAVA] TCP 소켓통신 파일전송 단계별 구현 - 파일스트림에 대한 이해
[JAVA] TCP 소켓통신 파일전송 단계별 구현 - 파일스트림에 대한 이해 — #JAVA소켓통신 #소켓통신 #소켓통신파일전송 #소켓통신파일 #개발자의도구들 AI스쿨 msa기반 java 백...
#JAVA소켓통신 #소켓통신 #소켓통신파일전송 #소켓통신파일 #개발자의도구들
AI스쿨 msa기반 java 백엔드 코스 중에 공부한 내용을 작성하였습니다
\* 현재 소켓통신 프로젝트를 진행중입니다. 전체적인 목차를 보시려면 여기에서 참고하세요

파일 전송 구현하기
이전글을 통해서 파일전송의 전체적인 흐름을 살펴보았습니다. 파일 전송을 위해선, 프로토콜이 필요하고, 송,수신측과 서버측에서 어떤 행동을 해야하는지 다 아셨을 것이라 생각됩니다.
오늘은 파일 전송을 단계별로 나눠서 천천히 적용시켜 볼 예정입니다. 가장 간단하게 작은 파일을 한번에 저장하여 파일이 어떤 방법으로 저장되는지 먼저 파악하겠습니다. 이후 큰 파일을 위해 분할하여 전송 후 저장하는 방법을 구현하고, 종적으로는 이전글에서 계획했던 대로 수신 id에게 파일을 전송하는 방법까지 구현해보겠습니다.
기본적인 파일 전송 (Test.ver)
FileStream에 대한 이해
가장 기본적으로 파일을 전송하고 저장하는 형태를 우선 구현하겠습니다. 작은 파일(10byte)로 전송한다고 가정하기에 잘라서 전송할 필요없이 바로 서버에서 수신자에게 넘겨 저장하겠습니다. 바로 저장할 거기 때문에 seq나 fileName을 붙이지 않는 프로토콜로 구성하였습니다.
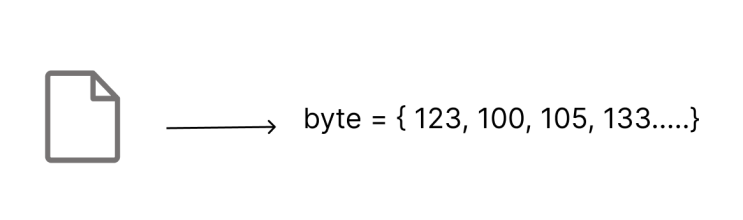
기본적으로 우리가 파일을 보내려면, 먼저 file에 해당하는 데이터를 읽은 후, 이진 데이터로 저장 후, 바이트 배열 형태로 전송을 합니다.
전송을 성공적으로 하기 위해 파일스트림이 어떻게 동작하는지 천천히 공부해봅시다.
FileStream in Java
먼저 File객체를 선언하여, 경로와 fileName으로 불러옵니다.
| File file = new File("filePath", fileName); |
|---|

FileInputStream으로 file객체와 클라이언트를 연결합니다. 스트림이기 떄문에 파일과 클라이언트 사이를 영원히 연결해주는 하나의 통로라고 이해하시면 됩니다.
| private void sendTestFile(String fileName) { File file = new File("C:\\Users\\yangd\\OneDrive\\바탕 화면\\filetest", fileName); try { FileInputStream fileInputStream = new FileInputStream(file); } catch (FileNotFoundException e) { throw new RuntimeException(e); } catch (IOException e) { throw new RuntimeException(e); }} |
|---|
파일스트림의 주요 특징은 끝이 없다는 것인데, 이는 한 동작에 해당하는 데이터가 어디서 끝났는지 구분을 할 수 없다는 말입니다. 그래서 항상 데이터를 사용하기전에 얼만큼의 데이터를 사용할 것인지 길이를 지정해 주어야합니다.
| private void sendTestFile(String receiver, String fileName) { File file = new File("C:\\Users\\yangd\\OneDrive\\바탕 화면\\filetest", fileName); try { FileInputStream fileInputStream = new FileInputStream(file); byte\[\] readByte = new byte\[(int) file.length()\]; int byteRead; while ((byteRead = fileInputStream.read(readByte)) != -1) { byte\[\] testHeader = FileProcessor.getTestFileHeader(MessageType.TEST, readByte); System.out.println("made packet: " + Arrays.toString(testHeader)); dataOutputStream.write(testHeader,0, testHeader.length); dataOutputStream.flush(); } // System.out.println("all filePacket be sent"); } catch (FileNotFoundException e) { throw new RuntimeException(e); } catch (IOException e) { throw new RuntimeException(e); }} |
|---|
readByte로 file크기만큼을 할당하여 데이터를 읽을 것입니다. 아 물론 여기서는 작은 바이트 상황을 가정해서 지정한 것이라 파일 전체 크기를 할당하였습니다.
byteRead는 현재 읽은 바이트의 수를 계속해서 카운트 합니다. 파일에 더이상 읽을 데이터가 없다면 -1을 읽어 들여 읽기가 종료됩니다.
readByte에는 파일의 전체 데이터가 들어있습니다. 이제 헤더를 추가해줍시다.
FileProcessor - add Header
FileProcessor는 클라이언트로부터 입력 받은 파일패킷에 헤더 정보를 더해서 반환해주고 있습니다.

아주 기본적인 프로토콜
현재는 아주 작은 파일만을 보내는것에 집중하고 있기 때문에 프로토콜이 매우 간단합니다. 우선 헤더 + 파일 크기를 ByteBuffer로 할당해 줍니다. ByteBuffer는 바이트를 읽고, 쓰는데 편리한 메서드를 제공해주어 다루기 편합니다.
| public class FileProcessor { public static byte\[\] getTestFileHeader(MessageType messageType, byte\[\] body) { int bodyLengthByteSize = 4; int typeByteSize = 4; int fileByteSize = body.length; System.out.println("fileByteSize: " + fileByteSize); ByteBuffer byteBuffer = ByteBuffer.allocate(bodyLengthByteSize + typeByteSize + fileByteSize); System.out.println("byteBuffer length: " + byteBuffer.capacity()); return byteBuffer.array(); }} |
|---|
이 프로토콜에서 bodyLength는 사실상 fileLength입니다. 현재 body에 file밖에 들어있지 않기 때문이지요. 매직 넘버 사용을 피하기 위해 할당시 어떤 사이즈인지 명시를 해줍시다.
| public class FileProcessor { public static byte\[\] getTestFileHeader(MessageType messageType, byte\[\] body) { int bodyLengthByteSize = 4; int typeByteSize = 4; int fileByteSize = body.length; System.out.println("fileByteSize: " + fileByteSize); ByteBuffer byteBuffer = ByteBuffer.allocate(bodyLengthByteSize + typeByteSize + fileByteSize); System.out.println("byteBuffer length: " + byteBuffer.capacity()); // body length byteBuffer.putInt(fileByteSize); byteBuffer.putInt(messageType.ordinal()); byteBuffer.put(body); return byteBuffer.array(); }} |
|---|
ByteBuffer에서 제공하는 메서드를 사용하여 버퍼에 데이터를 채워넣습니다.
putInt(int) : 정수를 4바이트로 변환하여 넣어줍니다.
put(byte\[\]): 원하는 byte\[\]를 ByteBuffer에 직접 넣을 수 있습니다.
위에 명시된 프로토콜 대로 정확히 헤더가 포함된 패킷이 완성되었습니다.
| private void sendTestFile(String fileName) { File file = new File("C:\\Users\\yangd\\OneDrive\\바탕 화면\\filetest", fileName); try { FileInputStream fileInputStream = new FileInputStream(file); byte\[\] readByte = new byte\[(int) file.length()\]; int byteRead; while ((byteRead = fileInputStream.read(readByte)) != -1) { byte\[\] testHeader = FileProcessor.getTestFileHeader(MessageType.TEST, readByte); System.out.println("made packet: " + Arrays.toString(testHeader)); dataOutputStream.write(testHeader,0, testHeader.length); dataOutputStream.flush(); } // System.out.println("all filePacket be sent"); } catch (FileNotFoundException e) { throw new RuntimeException(e); } catch (IOException e) { throw new RuntimeException(e); }} |
|---|
완성된 데이터는 dataOutputStream으로 보내줍니다.
서버측 : 모든 클라이언트에게 데이터 전송하기
서버측에서 MessageType.TEST를 감지하면 다음과 같은 프로세스로 모든 클라이언트에게 전송할 수 있습니다. (저장 없이 그냥 그대로 전송)
private void processTest(byte\[\] body, Socket sender) { //System.out.println("Test packet Received!!" + Arrays.toString(body)); ArrayList<ClientHandler> clientHandlers = new ArrayList<>(); synchronized (handlerLock) { for (Socket socket : handlerMap.keySet()) { if (socket == sender) { continue; } ClientHandler handler = handlerMap.get(socket); clientHandlers.add(handler); } } for (ClientHandler clientHandler : clientHandlers) { byte\[\] testByte = FileProcessor.getTestFileHeaderVerServer(MessageType.TEST, body); //System.out.println("send to all client \n data: " + Arrays.toString(testByte)); clientHandler.sendByte(testByte); }} |
|---|
서버측의 clientHandler는 클라이언트 연결시 각각 생성되는 핸들러 관리 객체입니다. 이는 서버 내에 저장되어 있습니다. 모든 클라이언트 핸들러 정보를 불러와서 패킷을 그대로 전송합니다.
현재 header부분은 자른체 processTest가 실행되도록 구현되어 있기 때문에 Header를 다시 붙여서 전송을 해주어야합니다.(이건 나중에 따로 올리겟습니다 - 정리 필요합니다.)
| public class FileProcessor { public static byte\[\] getTestFileHeaderVerServer(MessageType messageType, byte\[\] body) { int bodyLengthByteSize = 4; int typeByteSize = 4; int bodyByteSize = body.length; ByteBuffer byteBuffer = ByteBuffer.allocate(bodyLengthByteSize + typeByteSize + bodyByteSize); System.out.println("byteBugger Length (may be same as client)" + byteBuffer.capacity()); byteBuffer.putInt(body.length); byteBuffer.putInt(messageType.ordinal()); byteBuffer.put(body); return byteBuffer.array(); }} |
|---|
FileProcessor에서 서버측 파일전용 헤더를 추가하도록 메서드를 새로 생성합니다. 이는 클라이언트측에서는 String메세지가 포함되어(이후 추가 예정) 있지만, 서버는 byte\[\]만 전송하면 되어서 생기는 문제입니다. 이 코드는 나중에 일괄적으로 정리하겠습니다.
body길이 = 파일길이, 타입 길이와 정보만 추가해서 넣어주고 전달합니다.
수신 클라이언트
수신 클라이언트는 4바이트씩 끊어 읽어 bodyLength와 messageType을 읽거 이후 body를 읽어들입니다.
| public void run() { long threadId = Thread.currentThread().getId(); System.out.println("myid: "+ threadId); try { System.out.println("\n\[ Request ... \]"); socket.connect(new InetSocketAddress("localhost", tcpClientPort)); System.out.print("\n \[ Success connecting \] \n"); while (true) { OutputStream outputStream = socket.getOutputStream(); dataOutputStream = new DataOutputStream(outputStream); InputStream inputStream = socket.getInputStream(); DataInputStream dataInputStream = new DataInputStream(inputStream); int inAllLength = dataInputStream.readInt(); if(inAllLength > 0) { byte\[\] inLengthByte = new byte\[4\]; dataInputStream.readFully(inLengthByte); int messageLength = Share.readInputLength(inLengthByte); byte\[\] inTypeByte = new byte\[4\]; dataInputStream.readFully(inTypeByte); int typeInt = ByteBuffer.wrap(inTypeByte).getInt(); MessageType inMessageType = MessageType.values()\[typeInt\]; byte\[\] inMessageByte = new byte\[inAllLength - 8\]; dataInputStream.readFully(inMessageByte); String message = Share.readInputMessage(inMessageByte); if (inMessageType == MessageType.TEST) {; saveFile(inMessageByte); } } else if(inAllLength == 0){ // quit break; } } } catch (Exception e) { throw new RuntimeException(e); }} |
|---|
TEST타입이면 바로 saveFile(byte\[\] body)가 실행되도록 하였습니다. 현재는 body자체가 file이기 때문에 맨 처음에 사용된 bodyLength는 궂이 사용하지 않아도 됩니다. 그냥 body크기 자체가 file크기가 되닌깐요!

| private void saveFile(byte\[\] body) { try { String randomFileName = UUID.randomUUID().toString() + ".txt"; String directoryPath = "outputPath"; File file = new File(directoryPath, randomFileName); FileOutputStream fileOutputStream = new FileOutputStream(file); fileOutputStream.write(body); fileOutputStream.flush(); System.out.println("File saved successfully: " + file.getAbsolutePath()); } catch (IOException e) { e.printStackTrace(); }} |
|---|
file이름은 랜덤으로 하고 경로를 지정하여 저장하도록 하였습니다. 파일을 저장할때는 fileOutputStream을 사용해주면 됩니다.
파일이 정상적으로 저장되었음을 알 수 있습니다.